Importing results into CryoSPARC, 3D classification techniques.
Note: Use the outputs of the previous step as the inputs for the next step, unless otherwise noted.
Title
Value
Title
Description
Leave empty
Directory
Create Workspace
Enable
To import a
result group
, we'll need to link the directory where the file are located to a location within the CryoSPARC project directory that was just created.
Navigate to the project directory:
Make a new directory called
imports
and navigate into it:
Create a symbolic link from the source data into the
imports
directory:
Use the job builder to create an
Import Result Group
job.
Parameter
Value
Absolute path to .csg file
Select all exposures with a maximum CTF Fit Resolution (A) of 6A.
You should have 899 exposures to proceed with.
Parameter
Value
Minimum particle diameter (A)
Maximum particle diameter (A)
Use circular blob
False
Use elliptical blob
True
Select pick locations with an NCC >= 0.23 and Power Score > 80 and < 150.
You should end up with around 84K particle locations.
Parameter
Value
Number of CPU cores
Extraction box size (pix)
Fourier crop to box size (pix)
Parameter
Value
Number of GPUs to parallelize
Choose a set of 2D classes that look sharp and display secondary structure features.
You should end up with around 36K particles.
Use default parameters
Parameter
Value
Symmetry
Parameter
Value
Point group symmetry
Download the refined volume from the previous
Homogeneous Refinement
job.
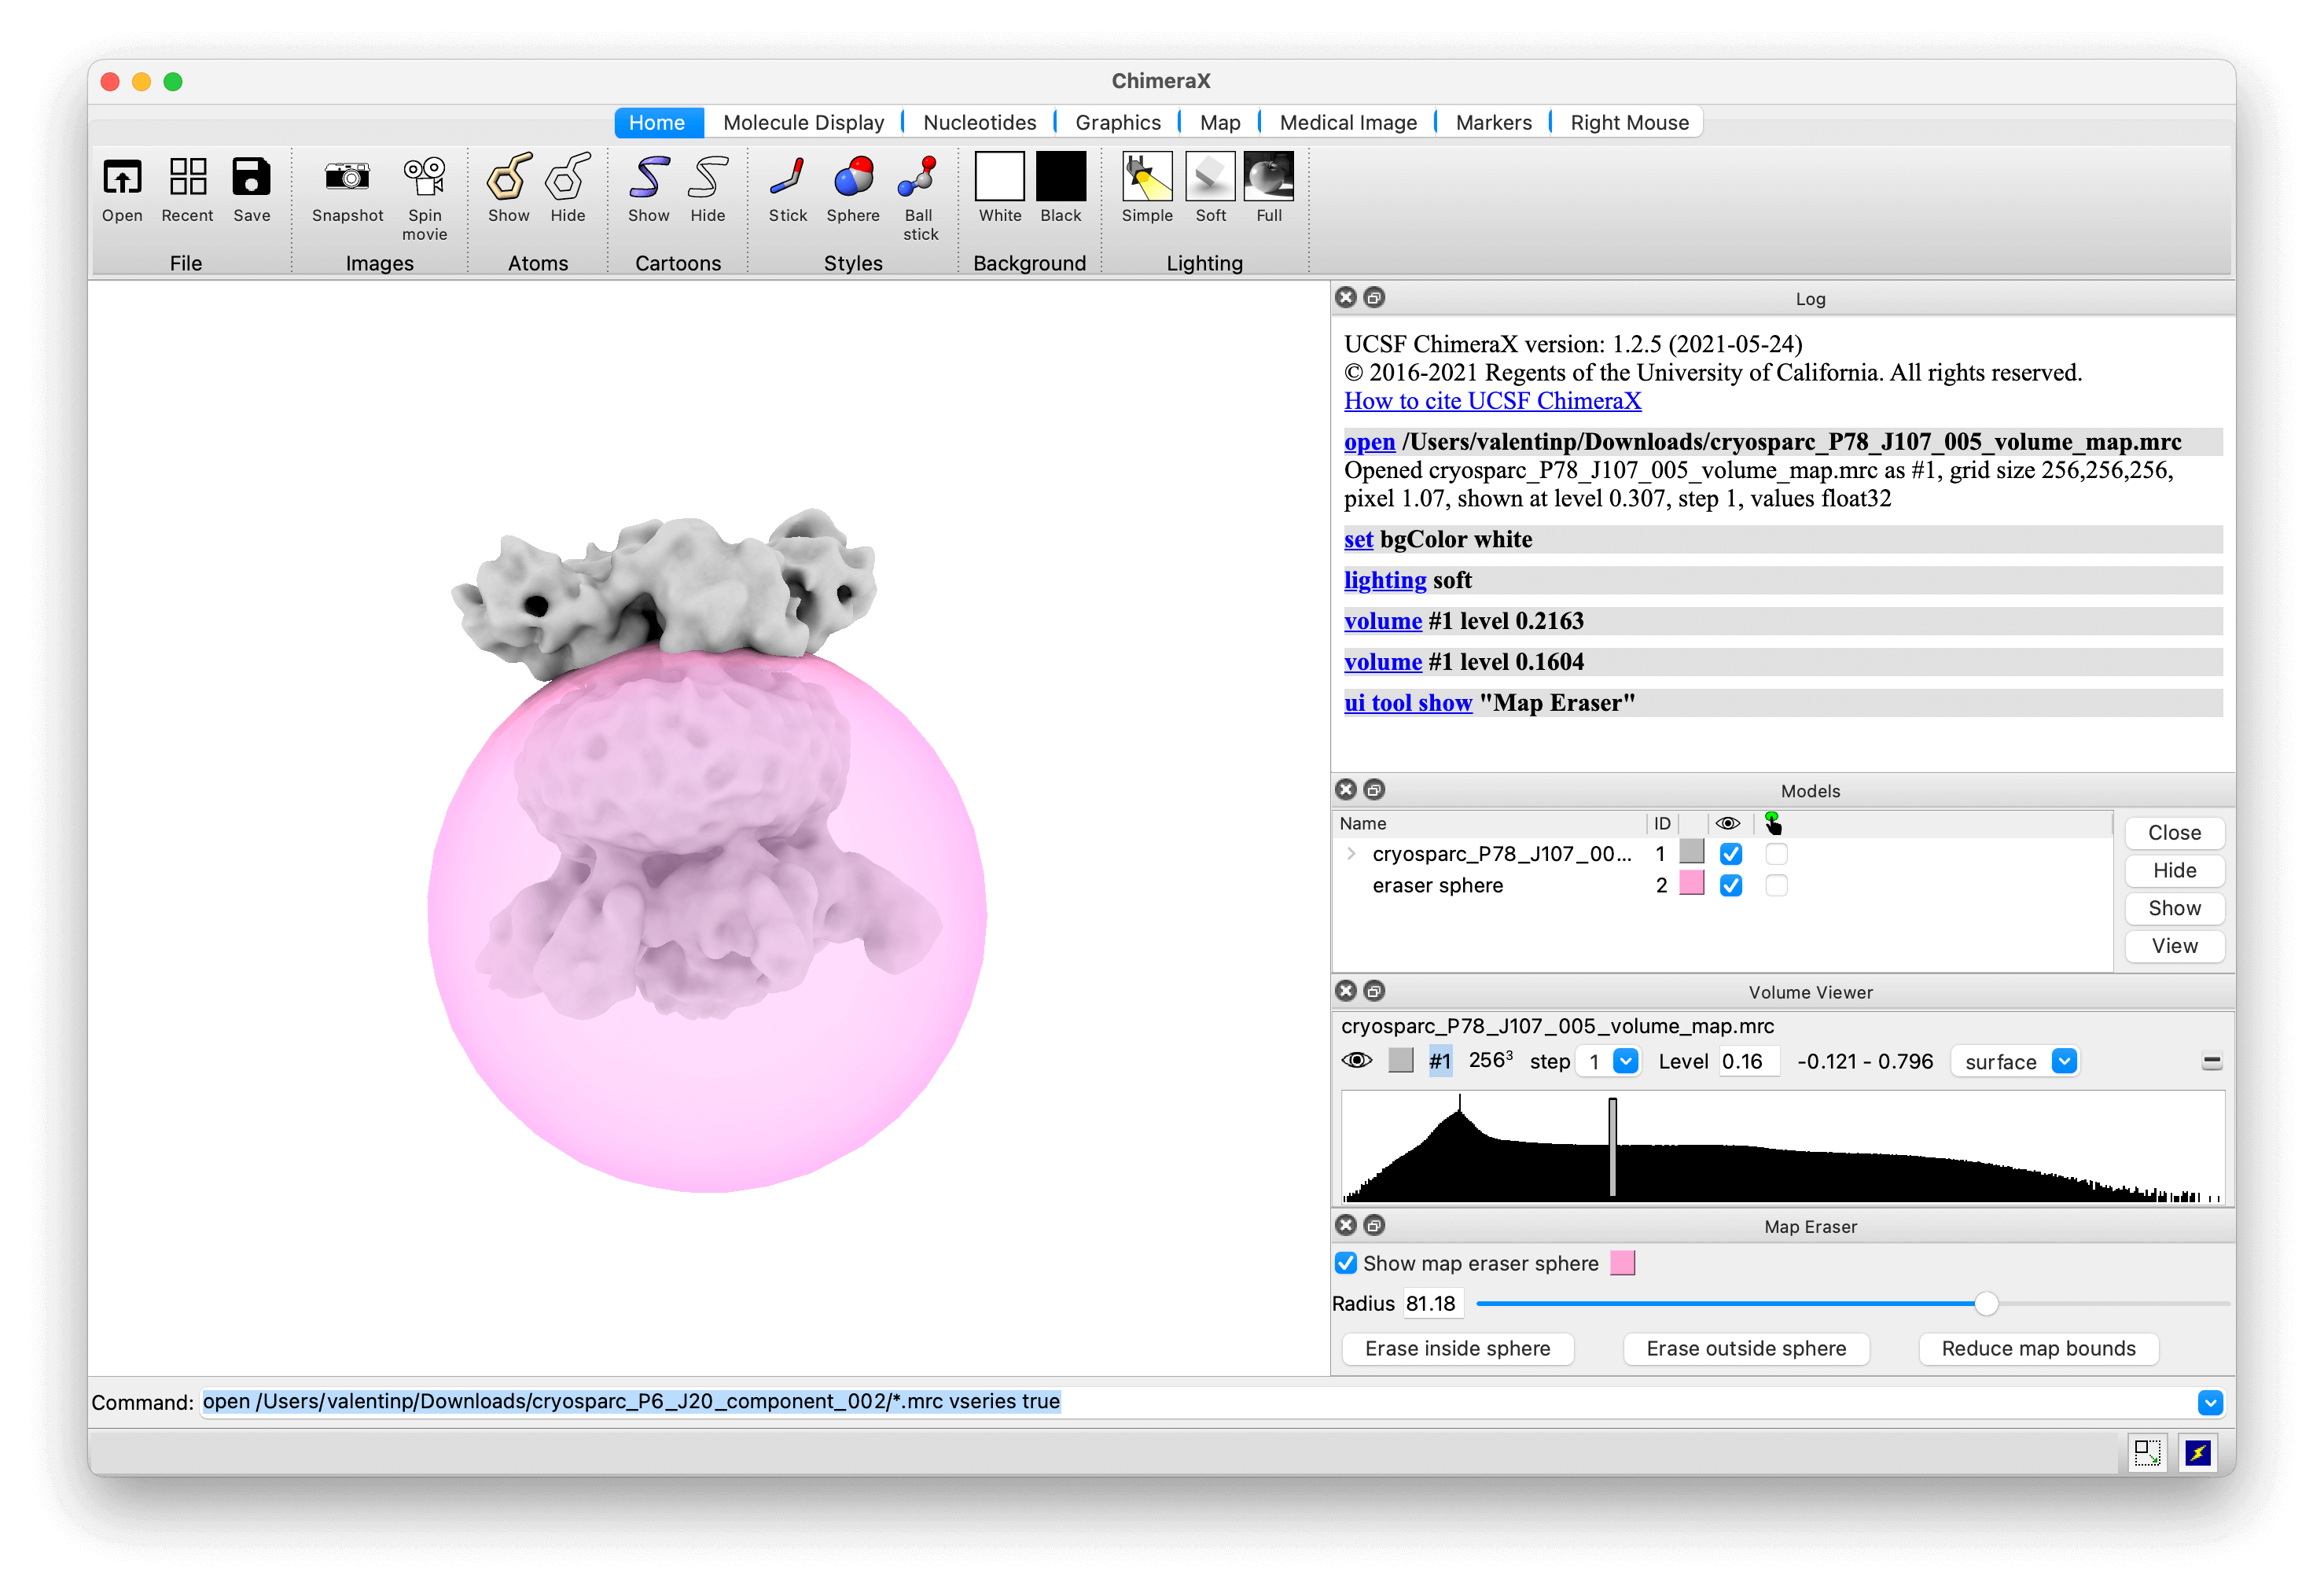
Open the map in UCSF ChimeraX, and note the opened structures model ID as
<model_id>
.
Decrease the threshold until you can clearly see both "lobes" (these are the MlaB domains, located opposite from the 6-fold symmetric MlaD domain). Note the threshold value
<threshold_number>
.
Open the
Map Eraser
(Under
Tools > Volume Data > Map Eraser
).
Erase the micelle and the 6-fold symmetric MlaD domain.
Use
to binarize the density map of the MlaB domain, to convert it to a mask.
Set all density values outside of the MlaB domain to 0:
Set all density values within the MlaB domain to 1:
Save the mask to your Desktop:
Upload the mask to your workstation via
scp
:
Parameter
Value
Volume data path
Type of volume being imported
Parameter
Value
Type of input volume
Type of output volume
Threshold (must set to process mask)
Dilation radius
Soft padding width
Input
Source
Particle stacks
Particles from Symmetry Expansion
Initial volumes
Leave empty
Solvent mask
Leave empty
Focus mask
Mask from Volume Tools
Parameter
Value
Number of classes
O-EM batch size (per class)
O-EM learning rate init
Maximum number of F-EM iters
O-EM learning rate halflife (%)
Output results after every F-EM iteration
No
Launch this job in parallel with 3D classification (using particles from symmetry expansion).
Input
Source
Particle stacks
Particles from Symmetry Expansion
Mask
Mask from Volume Tools
Parameter
Value
Filter resolution (A)
Parameter
Value
Downsample to box size
Parameter
Value
Output mode
Downsample to box size
Pick around 90 particles from 6 different exposures (density of ~15 particles per exposure), using the exposures from Manually Curate Exposures.
The Blob Picker Tuner automatically finds optimal blob picker parameters, using user-provided manual picks. You may launch the blob picker tuner using the manual picks from the previous step, together with the exposures from Manually Curate Exposures.